Adding a property to MLSVallarta
It is quite easy to add a new properties to the MLSVallarta database.
To do so, first sign in to the administrative back-end area of MLSVallarta. Then, click on "Add Property" in the left-side column.
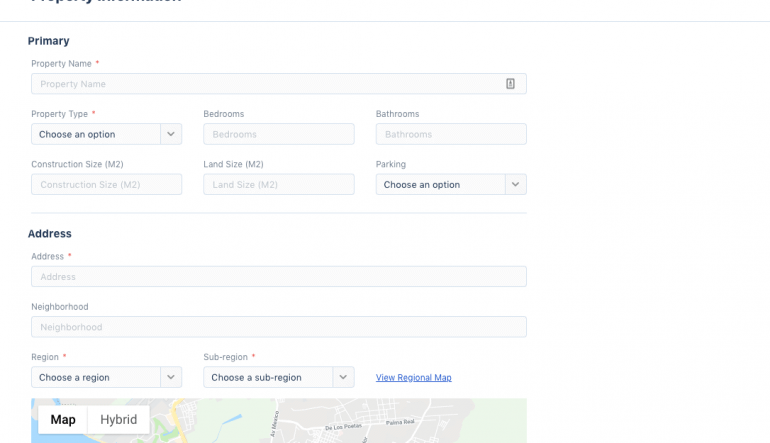
Once the page loads, you can start filling in information about your new listing.
To assist you with this, we’ve marked with a red asterisk the mandatory fields.
Property Description
Please keep in mind that full and interesting descriptions are of much more interest to other agents, or prospective buyers who may be searching online. So spending some time here can mean the difference between a property being found and sold, and not.
Property Location
To show the property’s location, make sure you accurately place the pin where it is located. You can drag it and zoom in and out to assist you with this. Double clicking on the map will zoom you in also.
Submit for approval
Not all fields are mandatory at this stage, so if you want you can first submit it with the information that is required, and then when it is approved you can fill it out fully. But do be aware that once it is approved it is showing on MLSVallarta as it is. So be sure to fill it out properly and add photos, as soon as possible, so it looks good.
Once you are done, click on the "I agree" button and then the "Add listing and upload photos" button. If the add listing button is not bright blue, it means you’ve missed a mandatory field. Go back and review the red asterisk fields to make sure they are all filled in.
We will then review it and approve it, or get back to you if something is missing.
Adding photos
Once saved and approved, you’ll be able to add photos of the property and update the information about it. To add photos simply drag-and-drop them, or use the link to browse for your images. Once they are there, click on the blue "Upload Photos" button.
The photos will be sized and cropped automatically, but the process will be faster if your image sizes are smaller to begin with. You can change the order in which the photos will appear online, here.
Review the listing information
Now’s a good time to go through the listing information thoroughly and check off all applicable fields. This is very important for search purposes. If you have people looking for places with elevators and ocean views, and you don’t have those checked off, (and your property has them), then your listing won’t appear in their search.
Save changes
Once done click save. Your listing is now in the system. Of course, you can return at anytime to make changes or additions by going to “My Listings."
